
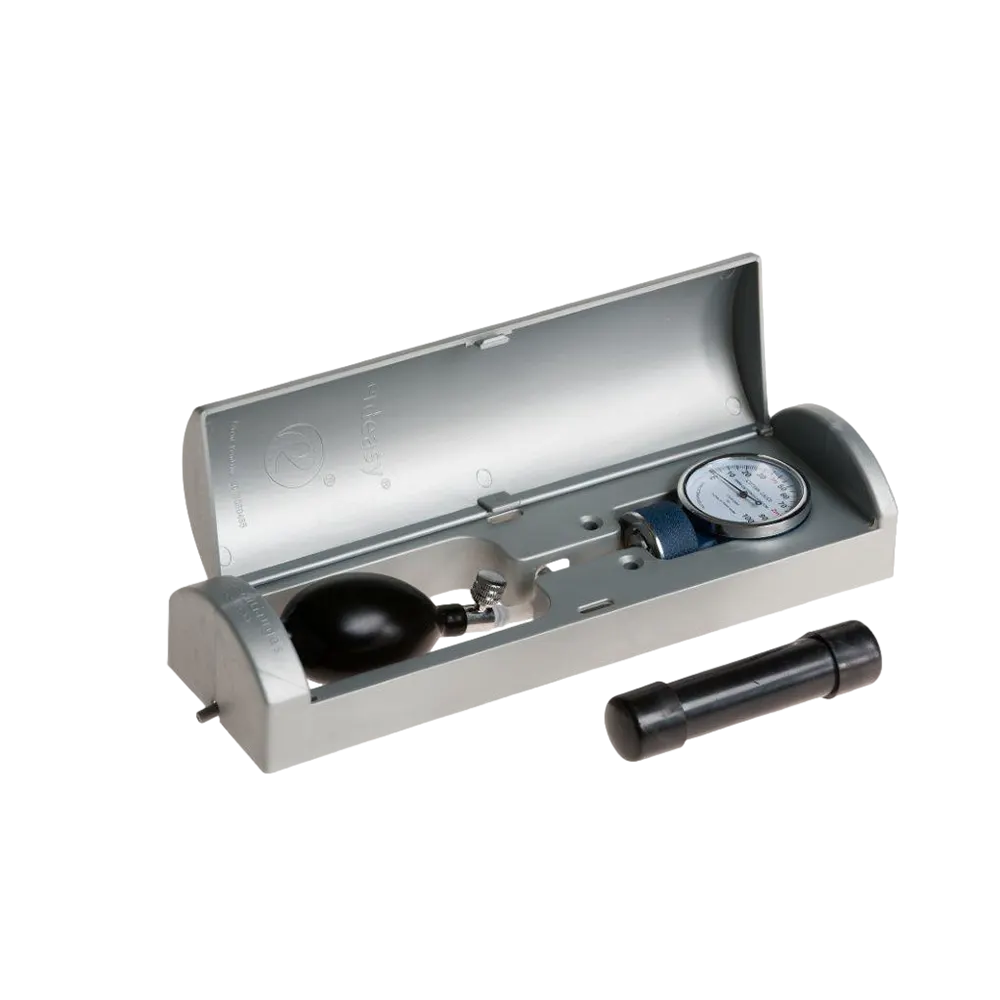
Water Tank Level Indicator
- Universal level gauge for rainwater tanks, wells, rain barrels and other water tanks, among others
- Easy installation
- Features retrofit. Fits all new water tanks, old cisterns and in foundation storage
- Analog, so no batteries required
- Durable and weatherproof housing
- 2-year warranty
- Free shipping to NL or BE for orders from € 85,-
- Free returns
- Current delivery time: 1 to 2 working days
- Customers rate us with a 9.1
- Trusted online shopping via:

Water Tank Level Indicator € 77,75 (incl. btw) € 64,26 (excl. btw)
Universal Level Gauge Water Tank
Suitable for Rainwater Wells,Recovery Tanks, Rain barrels and Other Water Tanks, among others.
Also known as a water tank level gauge, this water tank gauge is the most versatile indicator for measuring water level. Installation is quick and easy, and the gauge fits virtually all water tanks, water storage tanks, cisterns and wastewater tanks. What makes this meter special is that it requires no batteries and comes with a durable, weatherproof housing.
The water tank gauge can be integrated with existing water tanks and cisterns, making it possible to read the water level of your cistern or water tank from any convenient location. With this innovation, you can finally have a durable and affordable solution for measuring the depth of your cistern, well or water tank. Whether outside against the wall or inside next to your kitchen sink, this water tank gauge allows you to accurately measure the water level, even when it is rainwater.
Benefits of this level gauge
- Diaphragm pressure gauge.
- It is very sensitive and reads directly in inches of water (scale: 100 inches).
- The gauge comes with a nice, durable indoor and outdoor case to mount it on the wall and protect it from the weather.
- Durable. It is made of only the best materials.
- Aluminum gauge with copper inner parts.
- Safe. Don’t risk getting stuck without water, or letting your pump run dry.
- Easy installation can be as quick as in minutes.
- Retrofit. Fits all new water tanks, old cisterns and in foundation storage.
- Requires no electricity or batteries at all.
- 2 year warranty
Does this level meter run on batteries?
No, this level meter works completely analog and does not require batteries.
For which rainwater systems is this level meter suitable?
This universal water meter is suitable for the following rainwater systems, among others:
- Rainwater tanks
- Rainwater tanks
- Recovery tanks and systems
- Rain barrels
How do I install this level gauge?
The installation of this water meter is very simple. Just follow the following steps:
- Let the heavy nozzle business to the bottom of the water tank.
- Lead the tube outside the water tank to the lcoation where the meter is located.
- Hang the meter (in housing) on the wall and connect the tube to it.
Below you can find a schematic drawing showing the proper placement of the level meter.

How to read the level meter?
- Close the pressure relief screw (not too tight! otherwise it may break).
- Squeeze the pressure pump ball until the needle cannot rise any further (usually 1 to 5 times).
- Read the depth when the needle is stable (while not pumping!). For healthy water, you usually need to refill your tank before the reading goes below 25-38 inches.
Disclaimer: It is the user’s responsibility to regularly check the functionality of this device. The manufacturer of this product expressly disclaims all responsibility or liability for any damage, loss or injury resulting from the installation or use of this product.
Notes:
- Inside the housing, the tube should be routed as shown on the right side.
- The tube should never be kinked, plugged or leaking and the airflow should be unobstructed. The maximum length for the tube is about 6 meters. For longer tubes, pump two or three additional times to obtain a reading.
- The scale is in centimeters, but the red markings indicate depth in meters.
- The gauge and pressure pump ball must be protected. The better protected they are, the longer they will last. Close the housing after reading.
- The housing can be attached to the wall with the material provided. Be careful when drilling into the wall of a water tank.
Troubleshooting with this level meter
- Open the pressure relief screw and check that the needle drops to about zero (E). If it does not, use the small wrench to adjust the needle. The adjustment screw is located directly under the gauge and is part of the tube connection.
- Close the pressure relief screw. Do not overtighten or it will break.
- Apply pressure to the system until maximum pressure is reached. Do not apply pressure above 360 degrees clockwise. If this is possible, the system may be clogged. Check if the line is kinked, clogged or blocked. The maximum pressure should depend on the amount of water in the reservoir.
- Squeeze the pressure pump ball until the needle rises no further. Air bubbles are pumped out into the water tank section at the end of the tube. When the maximum pressure is reached (just pump until the needle does not go any higher), watch the needle to see if it remains stable. It should remain at the same pressure for about 10 seconds.
- The maximum reading represents the height of the water in the tank.
- If the needle drops too quickly, there is a leak in the system. Check the couplings, the bottom of the pressure pump ball and damaged parts of the tube with soapy water to detect leaks. Repair the leak.
- If the pump ball leaks, remove the ball by pulling it loose and spray some silicone oil into the valves. Oils or lubricants other than silicone can damage rubber parts. The upper valve is located in the metal part; the lower valve is located in the ball.